
Updated:
May 13, 2025
Published:
February 28, 2022
From Idea to Final Product: A Guide to App Design | KNGURU
At the beginning, a design is created that explains how the app works and shows how it should work one day. The app design goes through several phases, in which your idea is turned into a finished prototype of the app. In this way, communication problems can be eliminated before programming, and a concept can be created that completely meets your wishes.
What is an app design?
Would you like to have the iOS or Android app programmed? Under the term app design, you probably imagine the colorful buttons and logos in the finished app. However, this is only the “finishing touch” in the design process. The focus here is on the function of the app, its internal processes, and its interaction with the user. An app UX/UI designer takes care primarily about the functionality of the app and is based on the needs of the users and the customer's goal. In addition, of course, a visually appealing product should also be created that the end user likes to use. The look itself is also covered by the term app design but only plays a role when the functionality has been satisfactorily designed.
The first step of app development — briefing the customer
Regardless of whether you have native apps, programming web apps, or cross-platform apps, it all starts with your app idea. Developers need to get to know them as comprehensively and in as much detail as possible so that they can create a concept that meets your expectations. At the beginning of the process, you, therefore, create a briefing in which you include all the guidelines and information that the developers need. The more detail you go into, the better you can counteract misunderstandings early on and ensure that the design process runs quickly and smoothly.
Programming a mobile phone app — the first design
Your completed briefing serves as the basis for the first design that the developers create for your iOS app or Android app. At the beginning, so-called wireframes are used, which make it possible to build a basic design without concrete content. Continuous text is displayed in the form of placeholders or gray boxes, for example. In this way, everyone involved can already easily see what the finished app will look like without already having all the content. Wireframes define a rough structure and decide where which content will be placed later. This is used to structure the information and helps developers to organize all of your information in an orderly manner. Menus, buttons, and logos are also already being used here. In this way, the developers can show you how they imagine completing your project without extensive detailed work. If you are not satisfied or have requests for changes, they can usually be implemented in just a few simple steps. The design is still easy to adapt during this phase. This is used to adapt the still very rough prototype exactly to your ideas and thus make subsequent work easier.
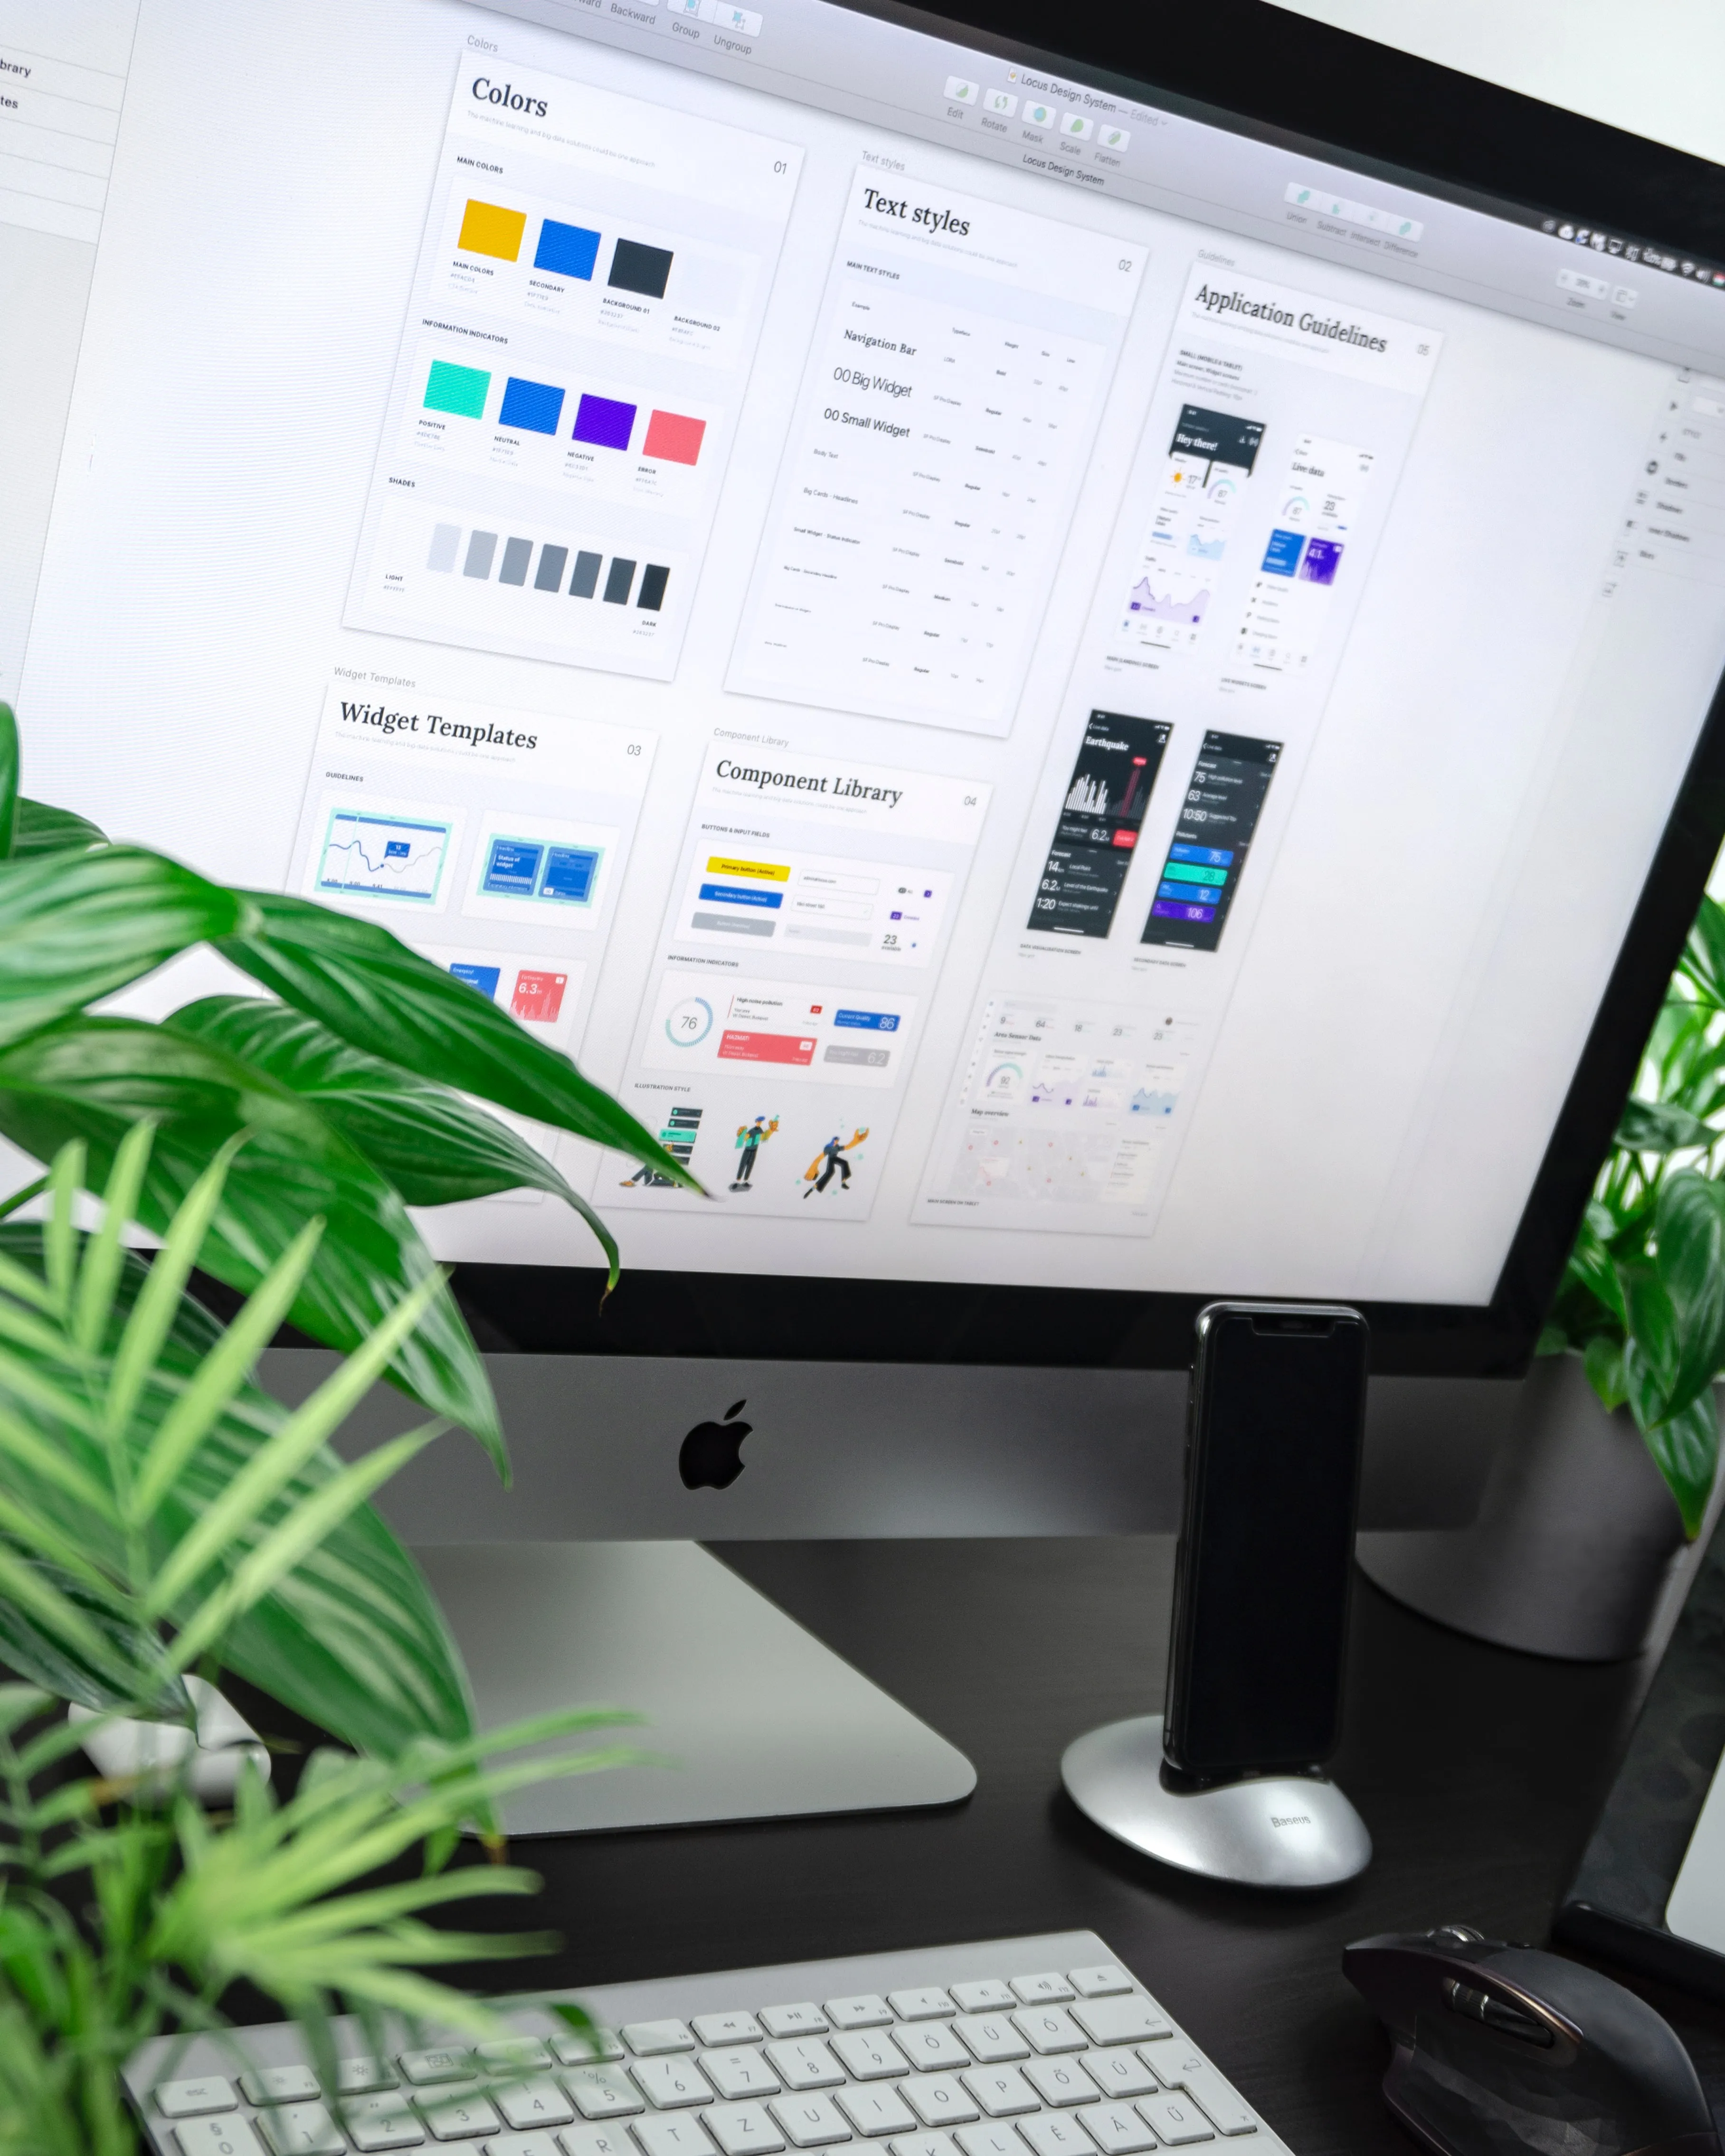
Develop an app — with mockups in detail
Once the first phase has been completed, Android and Apple developers use so-called mockups. They are more detailed than wireframes and allow a more accurate presentation of the design of the later native app, cross-platform app, or web app. Text and images are already integrated into mockups, which help the viewer get a realistic picture of the result. However, the building blocks are still static here, so the fine-tuning is still not visible here either. Even in this phase, developers work closely with their customers to receive direct feedback on the mockup and to be able to adapt it if necessary.
Android or iOS programming — the prototype of the app
Once the mockup has turned out to everyone's satisfaction, it's time to create the prototype. It completes the design process and is a detailed presentation of how the finished app will one day be available in the App Store or in the Google Play Store. Here, the focus is no longer on the graphical details that played a central role in the earlier phases. Instead, the focus is on the function. This means that you can now interact with the prototype and use it just as you would use Android apps on Android smartphones, for example. You can experience actual content and identify any usability issues. This once again makes it possible to find solutions and improve the design. One difficulty in this phase is the level of detail of the prototype. Although a design that is as detailed as possible offers an excellent insight into the final app, it is also very time-consuming. If, on the other hand, the prototype is designed too superficially, this can mean that it cannot be tested correctly and problems remain undetected when used by the user. If developers are supposed to program particularly complex hybrid apps or Android apps, they often create several prototypes. This allows them to get feedback quickly and constantly improve the design at the same time.
The design process ends with a detailed prototype that everyone involved is satisfied with. It already shows very precisely what the future app will look like and can be used. The prototype forms the basis for actual programming. With the help of the Java programming language, Java codes, and other tools such as an app builder, the idea of the customer and the designer is transformed into the finished app, which end users can finally download to their iOS or Android devices.
The prototype of the app also enables a precise definition of costs. The latter is difficult to assess on the basis of a rough idea, as the actual workload in Android Studio and the complexity of the app is only revealed when the customer's idea has been transformed into a design. During this process, wishes often change again, which can increase the workload and complicate the result. The prototype, on the other hand, records the exact processes in the app and defines the individual steps that are necessary until completion. The costs of your app can therefore be precisely estimated at this point.
At the beginning, a design is created that explains how the app works and shows how it should work one day. The app design goes through several phases, in which your idea is turned into a finished prototype of the app. In this way, communication problems can be eliminated yourself before programming and a concept can be created that completely meets your wishes.
What is an app design?
Would you like a Have the iOS or Android app programmed, under the term app design, you probably imagine the colorful buttons and logos in the finished app. However, this is only the “finishing touch” in the design process. The focus here is on the function of the app, its internal processes and its interaction with the user.
A App UX/UI designer takes care It is therefore primarily about the functionality of the app and is based on the needs of the users and the customer's goal. In addition, of course, a visually appealing product should also be created that the end user likes to use. The look itself is also covered by the term app design, but only plays a role when the functionality has been satisfactorily designed.
The first step of app development — briefing the customer
Regardless of whether you have native apps, Programming web apps or cross-platform apps Don't want to - it all starts with your app idea. Developers need to get to know them as comprehensively and in as much detail as possible so that they can create a concept that meets your expectations. At the beginning of the process, you therefore create a briefing in which you include all the guidelines and information that the developers need. The more detail you go into, the better you can counteract misunderstandings early on and ensure that the design process runs quickly and smoothly.
Programming a mobile phone app - the first design
Your completed briefing serves as the basis for the first design that the developers create for your iOS app or Android app. At the beginning, so-called wireframes are used, which make it possible to build a basic design without concrete content. Continuous text is displayed in the form of placeholders or gray boxes, for example. In this way, everyone involved can already easily see what the finished app will look like without already having all the content.
Wireframes define a rough structure and decide where which content will be placed later. This is used to structure the information and helps developers to organize all of your information in an orderly manner.
Menus, buttons and logos are also already being used here. In this way, the developers can show you how they imagine completing your project without extensive detailed work.
If you are not satisfied or have requests for changes, they can usually be implemented in just a few simple steps. The design is still easy to adapt during this phase. This is used to adapt the still very rough prototype exactly to your ideas and thus make subsequent work easier.
Develop an app - with mockups in detail
Once the first phase has been completed, Android and Apple Developers use so-called mockups. They are more detailed than wireframes and allow a more accurate presentation of the design of the later native app, cross-platform app or web app. Text and images are already integrated into mockups, which help the viewer get a realistic picture of the result. However, the building blocks are still static here, so that the fine-tuning is still not visible here either.
Even in this phase, developers work closely with their customer to receive direct feedback on the mockup and to be able to adapt it if necessary.
Android or iOS programming — the prototype of the app
Once the mockup has turned out to everyone's satisfaction, it's time to create the prototype. It completes the design process and is a detailed presentation of how the finished app will one day be available in the App Store or in the Google Play Store.
Here, the focus is no longer on the graphical details that played a central role in the earlier phases. Instead, the focus is on the function. This means that you can now interact with the prototype and use it just as you would use Android apps on Android smartphones, for example. You can experience actual content and identify any usability issues. This once again makes it possible to find solutions and improve the design.
One difficulty in this phase is the level of detail of the prototype. Although a design that is as detailed as possible offers an excellent insight into the final app, it is also very time-consuming. If, on the other hand, the prototype is designed too superficially, this can mean that it cannot be tested correctly and problems remain undetected when used by the user.
If developers are supposed to program particularly complex hybrid apps or Android apps, they often create several prototypes. This allows them to get feedback quickly and constantly improve the design at the same time.
The design process ends with a detailed prototype that everyone involved is satisfied with. It already shows very precisely what the future app will look like and can be used. The prototype forms the basis for actual programming. With the help of the Java programming language, Java codes and other tools such as an app builder, the idea of the customer and the designer is transformed into the finished app, which end users can finally download to their iOS or Android devices.
The prototype of the app also enables precise definition of costs. The latter are difficult to assess on the basis of a rough idea, as the actual workload in Android Studio and the complexity of the app is only revealed when the customer's idea has been transformed into a design. During this process, wishes often change again, which can increase the workload and complicate the result. The prototype, on the other hand, records the exact processes in the app and defines the individual steps that are necessary until completion. The costs of your app can therefore be precisely estimated at this point.
knguru
Wir setzen das in echten Projekten um.
100+ projekte eigene App mit 30.000 nutzern
App entwickeln - mit Mockups ins Detail
Ist die erste Phase abgeschlossen, bedienen sich Android und Apple Developer sogenannten Mockups. Sie sind detailreicher als Wireframes und ermöglichen eine genauere Darstellung des Designs der späteren native App, Cross-Platform App oder Web App. In Mockups werden bereits Texte und Bilder integriert, die dem Betrachter helfen, ein realistisches Bild des Ergebnisses zu erhalten. Die Bausteine sind hier allerdings nach wie vor statisch, sodass die Feinschliffe auch hier noch nicht erkennbar sind.
Auch in dieser Phase arbeiten Entwickler eng mit ihrem Kunden zusammen, um ein direktes Feedback zum Mockup zu erhalten und es bei Bedarf anpassen zu können.
Android oder iOS Programmierung - der Prototyp der App
Ist das Mockup zur Zufriedenheit aller ausgefallen, geht es nun an die Erstellung des Prototypen. Er beendet den Design Prozess und ist eine detailreiche Darstellung dessen, wie die fertige App einmal im App Store oder im Google Play Store erhältlich sein wird.
Hier liegt der Fokus nicht mehr auf den grafischen Details, die in den früheren Phasen eine zentrale Rolle gespielt haben. Stattdessen steht die Funktion im Vordergrund. Das bedeutet, dass Du nun mit dem Prototypen interagieren und ihn so verwenden kannst, wie Du zum Beispiel Android Apps auf Android Smartphones nutzen würdest. Du kannst den tatsächlichen Content erleben und etwaige Probleme in der Nutzerfreundlichkeit erkennen. Dies ermöglicht noch einmal die Lösungsfindung und Verbesserung des Designs.
Eine Schwierigkeit in dieser Phase ist der Detailgrad des Prototypen. Ein möglichst detailreiches Design bietet zwar einen hervorragenden Einblick in die finale App, ist aber auch sehr zeitintensiv. Wird der Prototyp hingegen zu oberflächlich entworfen, kann dies dazu führen, dass er nicht richtig getestet werden kann und Probleme in der Nutzung durch den User unentdeckt bleiben.
Sollen Entwickler besonders komplexe hybride Apps oder Android Apps programmieren, erschaffen sie oft mehrere Prototypen. Auf diese Weise können sie sich schnell Feedback einholen und das Design gleichzeitig ständig verbessern.
Der Design Prozess endet mit einem detailreichen Prototypen, mit dem alle Beteiligten zufrieden sind. Er zeigt bereits sehr genau auf, wie die spätere App einmal aussehen wird und genutzt werden kann. Der Prototyp bildet die Grundlage für die tatsächliche Programmierung. Dabei wird die Idee des Kunden und der Designer zum Beispiel mit Hilfe der Programmiersprache Java, Java Codes und anderen Hilfsmitteln wie einem App Baukasten in die fertige App verwandelt, die Endnutzer schließlich auf ihre iOS oder Android Geräte downloaden können.
Der Prototyp der App ermöglicht auch die genaue Definierung der Kosten. Letztere sind anhand einer groben Idee nur schwer einzuschätzen, da sich der tatsächliche Arbeitsaufwand im Android Studio und die Komplexität der App erst dann aufzeigt, wenn die Vorstellung des Kunden in ein Design verwandelt wurde. Oft ändern sich in diesem Prozess auch noch einmal die Wünsche, die den Arbeitsaufwand erhöhen und das Ergebnis verkomplizieren können. Der Prototyp hält hingegen die genauen Abläufe in der App fest und definiert die einzelnen Schritte, die bis zur Fertigstellung notwendig sind. Daher können die Kosten Deiner App an dieser Stelle bereits genau beziffert werden.


Zwischen Agenturalltag und Startup - unser Blog
In unserem Blog teilen wir Tipps rund um das Thema Appentwicklung, Startups und einige verrückte Geschichten aus unserem Agenturalltag mit euch.


Your 30-minute meeting with real experts.
Whether it's an idea or an existing app – we'll tell you honestly where you stand. All of this is free, based on experience from over 100 projects and our own app with 30,000 users. Book your meeting now and get to know us!

Oops! Something went wrong while submitting the form.